How to perform CRUD Operation in Laravel 9 Framework ?
Laravel
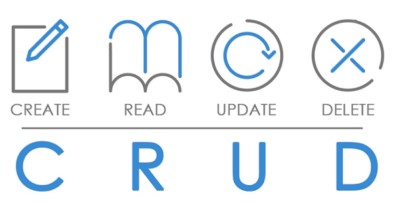
CRUD stands for Create, Read, Update and Delete. CRUD operations are some of the most common operations to perform on data in web applications even easy to do in Laravel.
Here at Fixwebnode, we shall look into how to perform CRUD operations in Laravel 9 and testing them.
Table of contents [Show]
- 1 1. Create a New Laravel 9 Project
- 2 2. Create a Model and Migration File
- 3 3. Configure Database
- 4 4. Create Database Table
- 5 5. Create a Migration File
- 6 6. Create a Controller
- 7 7. Create Routes
- 8 8. Create Form
- 9 9. Create the CRUD Methods
- 10 10. Test the CRUD Operations
- 11 [Need help fixing Laravel Application issues ? We can help you. ]
1. Create a New Laravel 9 Project
Start by creating a new Laravel 9 project. To do this, open a terminal window and enter the following command:
$ composer create-project --prefer-dist laravel/laravel blog
This will create a new Laravel 9 installation in a folder named "blog".
2. Create a Model and Migration File
Next, we will create a model and migration file. The model will be used to access the database and the migration file will be used to create the database tables. To do this, enter the following command in the terminal:
$ php artisan make:model Post -m
This will create a model file called "Post" and a migration file called "create_posts_table" in the "database/migrations" directory.
3. Configure Database
Now, configure the database. Open the ".env" file in the root of the project and set the database credentials. For example:
DB_CONNECTION=mysql
DB_HOST=127.0.0.1
DB_PORT=3306
DB_DATABASE=blog
DB_USERNAME=root
DB_PASSWORD=secret
4. Create Database Table
After setting the database credentials, enter the following command in the terminal to create the database table:
$ php artisan migrate
This will create the "posts" table in the database.
5. Create a Migration File
The next step is to create a migration file. This file will be used to create the columns in the "posts" table. To do this, enter the following command in the terminal:
$ php artisan make:migration create_post_columns
This will create a migration file called "create_post_columns" in the "database/migrations" directory.
Open the file and add the following code:
public function up()
{
    Schema::create('posts', function (Blueprint $table) {
        $table->id();
        $table->string('title');
        $table->text('body');
        $table->timestamps();
    });
}
This will create the "title" and "body" columns in the "posts" table.
6. Create a Controller
The next step is to create a controller. This controller will be used to handle the CRUD operations. To do this, enter the following command in the terminal:
$ php artisan make:controller PostController
This will create a controller file called "PostController" in the "app/Http/Controllers" directory.
7. Create Routes
Here, we will create routes. These routes will be used to call the controller methods. To do this, open the "routes/web.php" file and add the following code:
Route::resource('posts', 'PostController');
This will create the routes for all the CRUD operations.
8. Create Form
Now, we will create a form. This form will be used to submit the data to the controller. To do this, create a file called "create.blade.php" in the "resources/views" directory and add the following code:
<form action="/posts" method="post">
    @csrf
    <input type="text" name="title" placeholder="title"/>
    <textarea name="body"></textarea>
    <input type="submit" value="Submit"/>
</form>
This will create a form with a text input for the title and a textarea for the body.
9. Create the CRUD Methods
Here, we will create the CRUD methods in the controller. To do this, open the "PostController.php" file and add the following code:
public function store(Request $request)
{
    $post = new Post;
    $post->title = $request->title;
    $post->body = $request->body;
    $post->save();
    return redirect('/posts');
}

public function update(Request $request, $id)
{
    $post = Post::find($id);
    $post->title = $request->title;
    $post->body = $request->body;
    $post->save();
    return redirect('/posts');
}

public function destroy($id)
{
    $post = Post::find($id);
    $post->delete();
    return redirect('/posts');
}
This will create the methods for creating, updating and deleting posts.
10. Test the CRUD Operations
Finally, we will test the CRUD operations. To do this, open a browser and navigate to "http://localhost/posts".
This will show the list of posts.
To create a new post, click on the "Create Post" button and fill in the form.
To update a post, click on the "Edit" button and fill in the form. To delete a post, click on the "Delete" button.
After testing the CRUD operations, you can now be sure that they are working as expected.
[Need help fixing Laravel Application issues ? We can help you. ]
This tutorial covers how to perform CRUD operations in Laravel 9. Now, you will be able to work with data in a database in different ways.


